Before Charlotte actually out-grows her cot I thought I'd better finish off her room! Well, for that reason and also cause it's about time I finally shared it on my blog.
Of course it would have been completed four months ago before she actually arrived in the world if it hadn't been for that pesky
eight week hospital sojourn (giving it a sweet name derived from old French makes it sound so much more appealing!).
It's a neutral space with nothing too flash or poppy so for those who have been waiting (far too patiently!) for the reveal I hope its simplicity doesn't disappoint :-)
The nursery was originally our unfinished study/junk space/I-collect-too-much-furniture-and-have-nowhere-else-to-put-it room. It's teeny tiny, about this big...
...which made it a tricky little space to decorate (and photograph).
If you're new here and feel so inclined you can catch-up with the previous nursery posts here which outline some of the design process and projects to this point.
AFTER
To give the room some dimension, charm and crispness we dressed the walls with simple white board and batten. I didn't do a tutorial on this (mainly because there are already a squillion out there though also because we kinda just made it up as we went along). I will say however, that if you're considering a similar treatment it's actually pretty straight forward - especially if you're willing to call spak your friend :-)
To save extra painting (and because it's already nice and neutral) we decided to retain the original colour on the upper walls. It is Dulux Chalk USA as per the rest of our house.
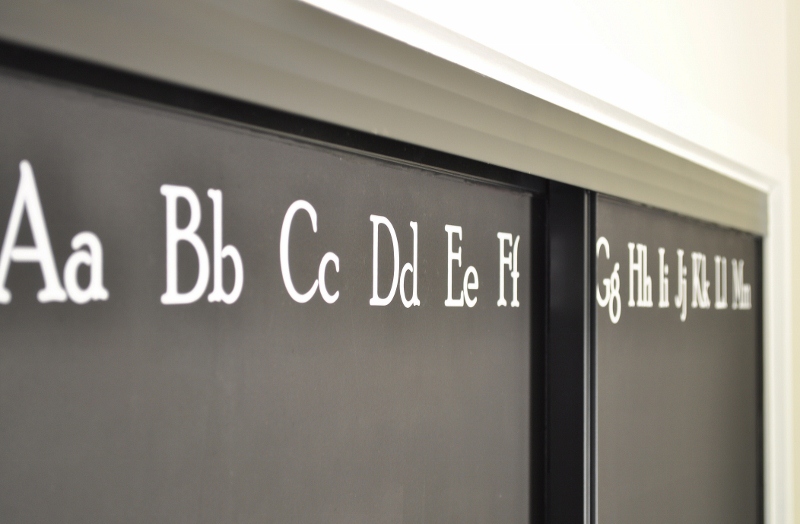
The generic old wardrobe doors had to go though rather than trash 'em we decided to rehash 'em, offering salvation in the form of chalkboard paint and custom alphabet decals.
BEFOREAFTERThe process was similar to how I transformed the built-in doors in my master bedroom
here.
We just removed the doors, bottom rail and fascia (which simply unscrewed) took them all outside and painted the metal beige areas with black enamel spray paint. Once dry, we gave the doors two coats of chalkboard paint. After a few days curing time I attached alphabet decals which I had custom made in Poor Richard font by
Leen the Graphics Queen. They remind me of a classroom blackboard - I really love them!
I picked up the cot (crib) off eBay for just $40.
BEFORE
I was umming and ahhring for ages about what colour and finish to go with though eventually settled for a warm grey.
I used organic acrylic (so it's safe when Charlotte decides to start munching on it) and mixed up the colour myself. I finished the cot with a subtle glaze and light distressing (so it will only add to the character when Charlotte decides to start munching on it!).
I also replaced the plastic castor wheels with an antique porcelain set taken from an old Edwardian chair.
AFTER
For some weird reason the window in the room sits slightly to the right so I hung the curtains centrally, covering the frame to create the illusion of symmetry.
Of course I needed a blackout solution and the linen drapes from IKEA were merely light filtering so I also used a textured blockout roller blind.
I knew from the get-go that I wanted an original antique to use as the change table. Eventually I found a reasonably priced gorgeous old mid 1800's cedar chest of drawers on eBay. I adore the patina and proportions. We keep all the change-time paraphernalia in the top drawers so it's completely accessible when needed though otherwise kept neatly hidden away.
I posted about mt eBay rocking chair mini makeover
here previously. I decided to enhance it a little further with some subtle burgundy grain sack stripes.
BEFORE
AFTER
The light fixture is a repurposed old zinc basket. You can read the full post and tutorial for that
here.
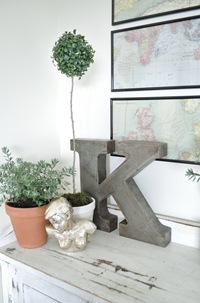
The gallery wall was basically free. I wanted to create a quirky vintage feel so used a mish-mash of frames (some I already owned and others from op shops)...
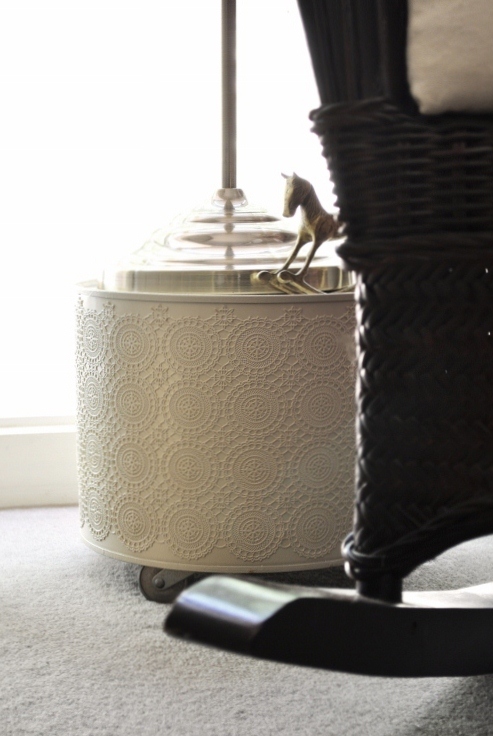
The lamp stand is a repurposed brake fluid drum! You can read about it in
this previous post.
BEFORE
I made the mobile using hand-carved timber birds, laser-cut metal leaves and some twigs from my backyard. You can read the tutorial for it
here. It adds a lovely organic feel to the room.
And to finish here are a few side-by-side B and A's just for comparisons sake.
BEFOREAFTERBEFOREAFTERBEFOREAFTERBEFOREAFTERHope you like it!
I'm taking Charlotte's willingness to sleep peacefully in there as her sign of approval :-)
Source and Price Guide
Linen Curtains: IKEA $90
Textured Blackout Roller Blind: Lincraft $80 (on sale)
Antique Chest of Drawers: eBay $300
Cot: eBay $40
Rocking Chair: eBay $100
Lamp Stand: DIY Project $5
Lamp: Sokol $110 (wholesale)
Cane Storage Baskets: Kmart $14
Wire Basket Ceiling Light: DIY Project $15
Wicker Waste Basket: The Reject Shop $10
Fitted Ticking Cot Sheet: Target $15
Throw Blanket: Spotlight $20 (on clearance)
Bird and Twig Mobile: DIY Project $15
Custom Alphabet Decals: Leen the Graphics Queen $14
Sheepskin Rug: Gift
Sunburst Mirror: Repurposed from Master Bedroom (originally from Oz Design $60)
Project Guide
For details relating to the Cot Makeover, Gallery Wall, Wardrobe Door Makeover and Board and Batten Treatment please refer to the post above.


%5B4%5D.jpg "MB 2010 (149)")
.JPG)
%5B4%5D.jpg "MB 2010 (154)")
%5B4%5D.jpg "MB 2010 (171)")
%5B4%5D.jpg "MB 2010 (27)")

%5B16%5D.jpg "2009 Bedroom (9)")
%5B4%5D.jpg "2009 Bedroom (12)")
%5B4%5D.jpg "Robe Before (6)")
%5B4%5D.jpg "2009 Bedroom (10)")


%5B4%5D.jpg "MB 2010 (115)")

%5B4%5D.jpg "MB 2010 (49)")

%5B4%5D.jpg "MB 2010 (141)")

%5B4%5D.jpg "MB 2010 (144)")

%5B4%5D.jpg "MB 2010 (173)")
%20-%20Copy%5B5%5D.jpg "2009 Bedroom (12) - Copy")
%5B9%5D.jpg "MB 2010 (171)")

%5B1%5D%5B2%5D.jpg "MB 2010 (41)")
%5B1%5D%5B4%5D.jpg "MB 2010 (87)")